HTML伺服器控件基本上是為了啟用伺服器端處理而增強的標準HTML控件。 HTML控件(如標題標籤,定位標籤和輸入元素)不由伺服器處理,而是發送給流覽器進行顯示。
它們通過添加屬性runat =“server”並添加一個id屬性專門轉換為伺服器控件,以使它們可用於伺服器端處理。
例如,考慮HTML輸入控件:
<input type="text" size="40">
可以通過添加runat和id屬性將其轉換為伺服器控件:
<input type="text" id="testtext" size="40" runat="server">
注意: 理解上面代碼機制,有助使用
asp和html標籤。
使用HTML伺服器控件的優點
儘管ASP.NET伺服器控件可以執行由HTML伺服器控件完成的每項工作,但以下控件在以下情況下非常有用:
- 使用靜態表格進行佈局。
- 將HTML頁面轉換為在ASP.NET下運行
下表介紹了HTML伺服器控件:
| 編號 | 控件名稱 | HTML標籤 | |
|---|---|---|---|
| 1 | HtmlHead |
<head> |
|
| 2 | HtmlInputButton |
<input type=button/submit/reset> |
|
| 3 | HtmlInputCheckbox |
<input type=checkbox> |
|
| 4 | HtmlInputFile |
<input type = file> |
|
| 5 | HtmlInputHidden |
<input type = hidden> |
|
| 6 | HtmlInputImage |
<input type = image> |
|
| 7 | HtmlInputPassword |
<input type = password> |
|
| 8 | HtmlInputRadioButton |
<input type = radio> |
|
| 9 | HtmlInputReset |
<input type = reset> |
|
| 10 | HtmlText |
`<input type = text | password>` |
| 11 | HtmlImage |
<img>元素 |
|
| 12 | HtmlLink |
<link>元素 |
|
| 13 | HtmlAnchor |
<a>元素 |
|
| 14 | HtmlButton |
<button>元素 |
|
| 15 | HtmlForm |
<form>元素 |
|
| 16 | HtmlTable |
<table>元素 |
|
| 17 | HtmlTableCell |
<td> 和 <th>元素 |
|
| 18 | HtmlTableRow |
<tr>元素 |
|
| 19 | HtmlTitle |
<title>元素 |
|
| 20 | HtmlSelect |
<select>元素 |
|
| 21 | HtmlGenericControl |
所有沒有列出的HTML控件 |
示例
以下示例使用基本的HTML表格進行佈局。 它使用了一些用於從用戶獲得輸入的框,例如名稱,地址,城市,省份等。它還具有按鈕控制,點擊該按鈕以獲取在表格的最後一行中顯示的用戶數據。
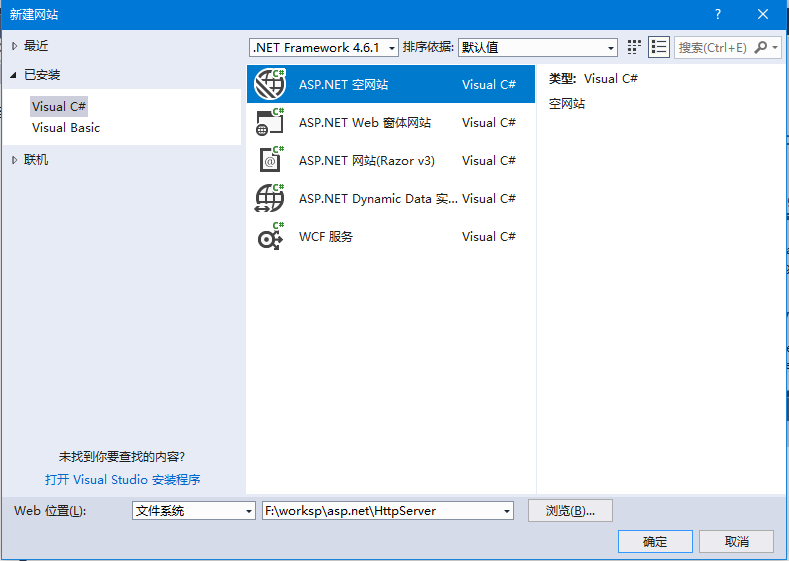
打開Visual Studio,創建一個空的網站專案:HttpServer,參考以下圖片 -

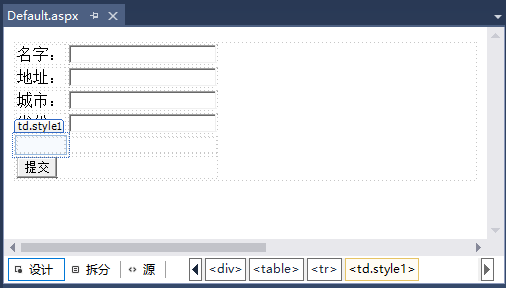
並向這個專案中添加一個Web窗體,存儲檔案名稱為:Default.aspx 。頁面在設計視圖中看起來像這樣:
內容頁面的代碼顯示了使用HTML表格元素進行佈局。參考以下代碼 -
<%@ Page Language="C#" AutoEventWireup="true" CodeFile="Default.aspx.cs" Inherits="_Default" %>

<!DOCTYPE html>

<html xmlns="http://www.w3.org/1999/xhtml">
<head runat="server">
<meta http-equiv="Content-Type" content="text/html; charset=utf-8"/>
    <title>用戶表單</title>
</head>
<body>
    <form id="form1" runat="server">
        <div>
            <table>
                <tr>
                    <td>名字:</td>
                    <td>
                        <asp:TextBox ID="txtname" runat="server"></asp:TextBox>
                    </td>
                </tr>

                <tr>
                    <td>地址:</td>
                    <td>
                        <asp:TextBox ID="txtstreet" runat="server"></asp:TextBox>
                    </td>
                </tr>

                <tr>
                    <td>城市:</td>
                    <td>
                        <asp:TextBox ID="txtcity" runat="server"></asp:TextBox>
                    </td>
                </tr>

                <tr>
                    <td>省份:</td>
                    <td>
                        <asp:TextBox ID="txtstate" runat="server"></asp:TextBox>
                    </td>
                </tr>
                <tr>
                  <td class="style1"></td>
                  <td ID="displayrow" runat ="server" class="style2">
                  </td>
               </tr>
                <tr>
                    <td colspan="2">

                        <asp:Button ID="Button1" runat="server" Text="提交" OnClick="Button1_Click" />

                    </td>

                </tr>

            </table>
        </div>
    </form>
</body>
</html>
按鈕控件後端的代碼(Default.aspx.cs):
using System;
using System.Collections.Generic;
using System.Linq;
using System.Web;
using System.Web.UI;
using System.Web.UI.WebControls;

public partial class _Default : System.Web.UI.Page
{
    protected void Page_Load(object sender, EventArgs e)
    {

    }

    protected void Button1_Click(object sender, EventArgs e)
    {
        string str = "";
        str += txtname.Text + "<br />";
        str += txtstreet.Text + "<br />";
        str += txtcity.Text + "<br />";
        str += txtstate.Text + "<br />";
        displayrow.InnerHtml = str;
    }
}
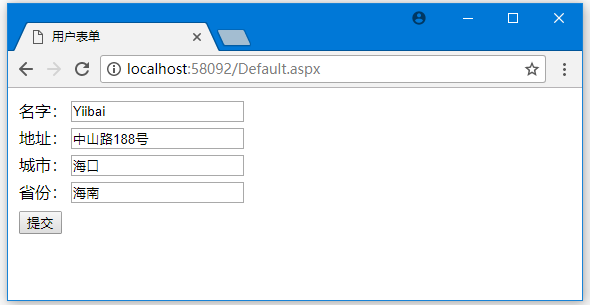
運行上面代碼,得到以下結果 -

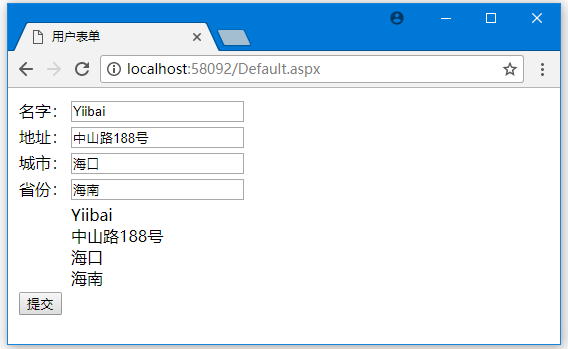
填入上述表單內容,然後提交 -

注意以下幾點:
- 標準的HTML標籤可用於頁面佈局。
- HTML表格的最後一行用於數據顯示。 它需要伺服器端處理,所以
ID屬性和runat屬性需要添加到標籤中。
上一篇:
ASP.NET伺服器控件
下一篇:
ASP.NET客戶端
