在上一章中,我們創建了一個RMI應用程式的示例。 在本章中,我們將介紹如何創建一個客戶端調用顯示GUI窗口(基於JavaFX)的RMI應用程式。
定義遠程介面
在這裏,首先定義一個名稱為Hello的遠程介面,此介面中有一個名稱為animation()的方法。
import java.rmi.Remote;
import java.rmi.RemoteException;

// Creating Remote interface for our application
public interface Hello extends Remote {
   void animation() throws RemoteException;
}
開發實現類
在本應用程式的Implementation類(遠程對象)中,將創建一個使用JavaFX顯示GUI內容的窗口。創建一個Java源代碼檔:FxSample.java,其代碼如下所示 -
import javafx.animation.RotateTransition;
import javafx.application.Application;
import javafx.event.EventHandler;

import javafx.scene.Group;
import javafx.scene.PerspectiveCamera;
import javafx.scene.Scene;
import javafx.scene.control.TextField;
import javafx.scene.input.KeyEvent;
import javafx.scene.paint.Color;
import javafx.scene.paint.PhongMaterial;

import javafx.scene.shape.Box;
import javafx.scene.text.Font;
import javafx.scene.text.FontWeight;
import javafx.scene.text.Text;
import javafx.scene.transform.Rotate;

import javafx.stage.Stage;
import javafx.util.Duration;

// Implementing the remote interface
public class FxSample extends Application implements Hello {
   @Override
   public void start(Stage stage) {
      // Drawing a Box
      Box box = new Box();

      // Setting the properties of the Box
      box.setWidth(150.0);
      box.setHeight(150.0);
      box.setDepth(100.0);

      // Setting the position of the box
      box.setTranslateX(350);
      box.setTranslateY(150);
      box.setTranslateZ(50);

      // Setting the text
      Text text = new Text(
         "Type any letter to rotate the box, and click on the box to stop the rotation");

      // Setting the font of the text
      text.setFont(Font.font(null, FontWeight.BOLD, 15));

      // Setting the color of the text
      text.setFill(Color.CRIMSON);

      // Setting the position of the text
      text.setX(20);
      text.setY(50);

      // Setting the material of the box
      PhongMaterial material = new PhongMaterial();
      material.setDiffuseColor(Color.DARKSLATEBLUE);

      // Setting the diffuse color material to box
      box.setMaterial(material);

      // Setting the rotation animation to the box
      RotateTransition rotateTransition = new RotateTransition();

      // Setting the duration for the transition
      rotateTransition.setDuration(Duration.millis(1000));

      // Setting the node for the transition
      rotateTransition.setNode(box);

      // Setting the axis of the rotation
      rotateTransition.setAxis(Rotate.Y_AXIS);

      // Setting the angle of the rotation
      rotateTransition.setByAngle(360);

      // Setting the cycle count for the transition
      rotateTransition.setCycleCount(50);

      // Setting auto reverse value to false
      rotateTransition.setAutoReverse(false);

      // Creating a text filed
      TextField textField = new TextField();

      // Setting the position of the text field
      textField.setLayoutX(50);
      textField.setLayoutY(100);

      // Handling the key typed event
      EventHandler<KeyEvent> eventHandlerTextField = new EventHandler<KeyEvent>() {
         @Override
         public void handle(KeyEvent event) {
            // Playing the animation
            rotateTransition.play();
         }
      };

      // Adding an event handler to the text feld
      textField.addEventHandler(KeyEvent.KEY_TYPED, eventHandlerTextField);

      // Handling the mouse clicked event(on box)
      EventHandler<javafx.scene.input.MouseEvent> eventHandlerBox =
         new EventHandler<javafx.scene.input.MouseEvent>() {
         @Override
         public void handle(javafx.scene.input.MouseEvent e) {
            rotateTransition.stop();
         }
      };

      // Adding the event handler to the box
      box.addEventHandler(javafx.scene.input.MouseEvent.MOUSE_CLICKED, eventHandlerBox);

      // Creating a Group object
      Group root = new Group(box, textField, text);

      // Creating a scene object
      Scene scene = new Scene(root, 600, 300);

      // Setting camera
      PerspectiveCamera camera = new PerspectiveCamera(false);
      camera.setTranslateX(0);
      camera.setTranslateY(0);
      camera.setTranslateZ(0);
      scene.setCamera(camera);

      // Setting title to the Stage
      stage.setTitle("Event Handlers Example");

      // Adding scene to the stage
      stage.setScene(scene);

      // Displaying the contents of the stage
      stage.show();
   }

   // Implementing the interface method
   public void animation() {
      launch();
   }
}
伺服器程式
RMI伺服器程式應實現遠程介面或擴展實現類。 在這裏,應該創建一個遠程對象並將其綁定到RMIregistry。
以下是本應用程式的伺服器程式。在這裏,我們將擴展上述創建的類,創建一個遠程對象,並使用綁定名稱:hello 將其註冊到RMI註冊表。創建一個Java源代碼檔:Server.java,其代碼如下所示 -
import java.rmi.registry.Registry;
import java.rmi.registry.LocateRegistry;
import java.rmi.RemoteException;
import java.rmi.server.UnicastRemoteObject;

public class Server extends FxSample {
   public Server() {}
   public static void main(String args[]) {
      try {
         // Instantiating the implementation class
         FxSample obj = new FxSample();

         // Exporting the object of implementation class
         // (here we are exporting the remote object to the stub)
         Hello stub = (Hello) UnicastRemoteObject.exportObject(obj, 0);

         // Binding the remote object (stub) in the registry
         Registry registry = LocateRegistry.getRegistry();

         registry.bind("Hello", stub);
         System.err.println("Server ready");
      } catch (Exception e) {
         System.err.println("Server exception: " + e.toString());
         e.printStackTrace();
      }
   }
}
客戶端程式
以下是本應用程式的客戶端程式。 在這裏,我們提取遠程對象並調用其animation()方法。創建一個Java源代碼檔:Client.java,其代碼如下所示 -
import java.rmi.registry.LocateRegistry;
import java.rmi.registry.Registry;

public class Client {
   private Client() {}
   public static void main(String[] args) {
      try {
         // Getting the registry
         Registry registry = LocateRegistry.getRegistry(null);

         // Looking up the registry for the remote object
         Hello stub = (Hello) registry.lookup("Hello");

         // Calling the remote method using the obtained object
         stub.animation();

         System.out.println("Remote method invoked");
      } catch (Exception e) {
         System.err.println("Client exception: " + e.toString());
         e.printStackTrace();
      }
   }
}
運行示例的步驟
以下是運行RMI示例的步驟。
第一步 - 打開存儲所有程式的檔夾,並編譯所有Java檔,如下所示。
F:\worksp\java_rmi\java-gui>javac *.java
F:\worksp\java_rmi\java-gui>
第二步 - 使用以下命令啟動rmi註冊表。
start rmiregistry
這將在單獨的窗口中啟動一個rmi註冊表,如下所示。
第三步 - 運行伺服器類檔,如下所示。
F:\worksp\java_rmi\java-gui>java Server
Server ready
第四步 - 運行客戶端類檔,如下所示。
F:\worksp\java_rmi\java-gui> java Client
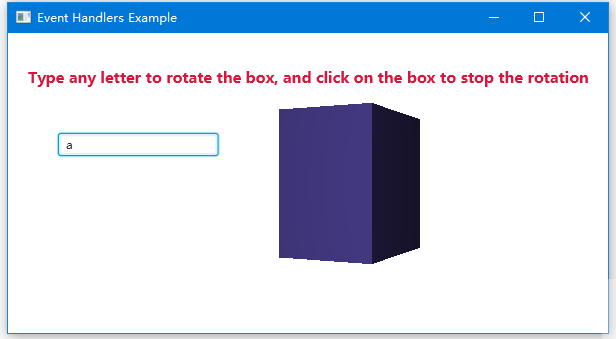
驗證調用結果 - 當啟動客戶端以後,將在伺服器中看到啟動一個圖形介面,如下所示 -
上一篇:
Java RMI應用程式
下一篇:
Java RMI資料庫應用程式