在Java語言編程中,如何使用java啟用電腦的攝像頭攝相拍照?
注意:需要訪問網址:http://book2s.com/java/jar/o/opencv/download-opencv-3.2.0-0.html , 下載一個OpenCV軟體包。這裏下載最新版本:opencv-3.2.0-vc14.exe並解壓此檔到D:\software\opencv目錄中。
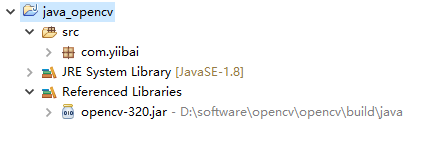
專案結構如下圖所示 -
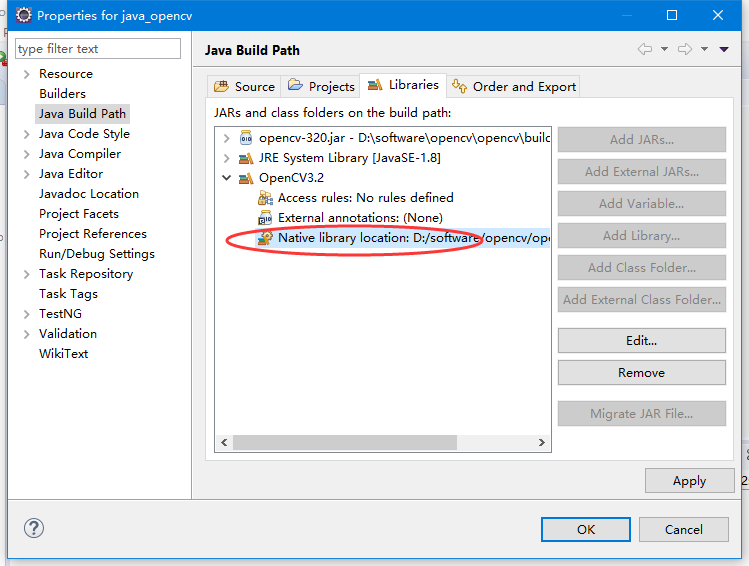
添加一個用戶自定義庫:OpenCV3.2,並指配置構建路徑為:D:\software\opencv\opencv\build\java\x64,如下圖所示 -
注:可參考: http://blog.csdn.net/shawncheer/article/details/51098456
以下是使用Java從系統攝像頭拍攝快照的程式 -
package com.zaixian;

import java.awt.image.BufferedImage;
import java.awt.image.DataBufferByte;
import java.awt.image.WritableRaster;

import java.io.FileNotFoundException;
import java.io.IOException;

import javafx.application.Application;
import javafx.embed.swing.SwingFXUtils;
import javafx.scene.Group;
import javafx.scene.Scene;
import javafx.scene.image.ImageView;
import javafx.scene.image.WritableImage;
import javafx.stage.Stage;

import org.opencv.core.Core;
import org.opencv.core.Mat;
import org.opencv.videoio.VideoCapture;

public class TakingSnapshotUsingCamera extends Application {
    Mat matrix = null;

    @Override
    public void start(Stage stage) throws FileNotFoundException, IOException {

        // Capturing the snapshot from the camera
        TakingSnapshotUsingCamera obj = new TakingSnapshotUsingCamera();
        WritableImage writableImage = obj.capureSnapShot();

        // Setting the image view
        ImageView imageView = new ImageView(writableImage);

        // setting the fit height and width of the image view
        imageView.setFitHeight(400);
        imageView.setFitWidth(600);

        // Setting the preserve ratio of the image view
        imageView.setPreserveRatio(true);

        // Creating a Group object
        Group root = new Group(imageView);

        // Creating a scene object
        Scene scene = new Scene(root, 600, 400);

        // Setting title to the Stage
        stage.setTitle("啟用攝向頭照像");

        // Adding scene to the satge
        stage.setScene(scene);

        // Displaying the contents of the stage
        stage.show();
    }

    public WritableImage capureSnapShot() {
        WritableImage WritableImage = null;

        // Loading the OpenCV core library
        System.loadLibrary(Core.NATIVE_LIBRARY_NAME);

        // Instantiating the VideoCapture class (camera:: 0)
        VideoCapture capture = new VideoCapture(0);

        // Reading the next video frame from the camera
        Mat matrix = new Mat();
        capture.read(matrix);

        // If camera is opened
        if (capture.isOpened()) {

            // If there is next video frame
            if (capture.read(matrix)) {

                // Creating BuffredImage from the matrix
                BufferedImage image = new BufferedImage(matrix.width(), matrix.height(), BufferedImage.TYPE_3BYTE_BGR);

                WritableRaster raster = image.getRaster();
                DataBufferByte dataBuffer = (DataBufferByte) raster.getDataBuffer();
                byte[] data = dataBuffer.getData();
                matrix.get(0, 0, data);
                this.matrix = matrix;

                // Creating the Writable Image
                WritableImage = SwingFXUtils.toFXImage(image, null);
            }
        }
        return WritableImage;
    }

    public static void main(String args[]) {
        launch(args);
    }
}
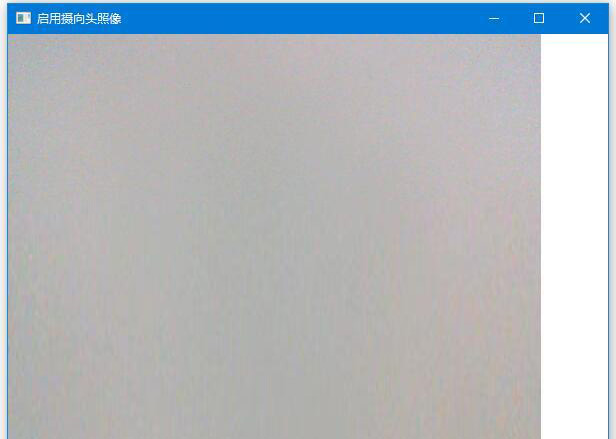
在執行上面示例代碼成功後,應該會看到如下輸出 -
問題
F:\worksp\javaexamples\java_opencv
Exception in thread "main" java.lang.UnsatisfiedLinkError: no opencv_java320 in java.library.path
    at java.lang.ClassLoader.loadLibrary(Unknown Source)
    at java.lang.Runtime.loadLibrary0(Unknown Source)
    at java.lang.System.loadLibrary(Unknown Source)
    at com.zaixian.CopyAndPasteAnImage.main(CopyAndPasteAnImage.java:13)
解決上述問題可通過參考: http://blog.csdn.net/shawncheer/article/details/51098456
上一篇:
Java OpenCV
下一篇:
Apache Tika示例