我们可以在JSF中创建自己的自定义验证器。以下列表是在JSF中创建自定义验证器的步骤。
- 通过实现
javax.faces.validator.Validator接口创建一个验证器类。 - 实现上面接口的
validate()方法。 - 使用注释
@FacesValidator为自定义验证器分配唯一的ID。
自定义验证器类实例
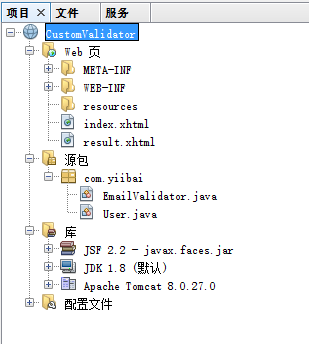
打开 NetBeans IDE 创建一个Web工程:CustomValidator,其目录结构如下所示 -
创建以下文件代码,文件:index.xhtml 的代码内容如下所示 -
<?xml version="1.0" encoding="UTF-8"?>
<!DOCTYPE html PUBLIC "-//W3C//DTD XHTML 1.0 Transitional//EN"
    "http://www.w3.org/TR/xhtml1/DTD/xhtml1-transitional.dtd">
<html xmlns="http://www.w3.org/1999/xhtml"
      xmlns:h="http://java.sun.com/jsf/html"
      xmlns:f="http://java.sun.com/jsf/core">
    <h:body>
        <h:form>
            <h:panelGrid columns="3">
                Enter your email :
                <h:inputText id="email" value="#{user.email}"
                             size="20" required="true" label="Email Address">
                    <f:validator validatorId="com.zaixian.EmailValidator" />
                </h:inputText>
                <h:message for="email" style="color:red" />
            </h:panelGrid>
            <h:commandButton value="Submit" action="result" />
        </h:form>
    </h:body>
</html>
文件:result.xhtml 的代码内容如下所示 -
<?xml version="1.0" encoding="UTF-8"?>
<!DOCTYPE html PUBLIC "-//W3C//DTD XHTML 1.0 Transitional//EN"
    "http://www.w3.org/TR/xhtml1/DTD/xhtml1-transitional.dtd">
<html xmlns="http://www.w3.org/1999/xhtml"
      xmlns:h="http://java.sun.com/jsf/html"
      >
    <h:body>

        <h1>Custom validator in JSF 2.0</h1>

        <h:panelGrid columns="2">

            Email Address :
            <h:outputText value="#{user.email}" />

        </h:panelGrid>

    </h:body>
</html>
文件:EmailValidator.java 的代码内容如下所示 -
/*
 * To change this license header, choose License Headers in Project Properties.
 * To change this template file, choose Tools | Templates
 * and open the template in the editor.
 */
package com.zaixian;

/**
 *
 * @author Administrator
 */
import java.util.regex.Matcher;
import java.util.regex.Pattern;

import javax.faces.application.FacesMessage;
import javax.faces.component.UIComponent;
import javax.faces.context.FacesContext;
import javax.faces.validator.FacesValidator;
import javax.faces.validator.Validator;
import javax.faces.validator.ValidatorException;

@FacesValidator("com.zaixian.EmailValidator")
public class EmailValidator implements Validator {

    private static final String EMAIL_PATTERN = "^[_A-Za-z0-9-]+(\\."
            + "[_A-Za-z0-9-]+)*@[A-Za-z0-9]+(\\.[A-Za-z0-9]+)*"
            + "(\\.[A-Za-z]{2,})$";

    private Pattern pattern;
    private Matcher matcher;

    public EmailValidator() {
        pattern = Pattern.compile(EMAIL_PATTERN);
    }

    @Override
    public void validate(FacesContext context, UIComponent component,
            Object value) throws ValidatorException {

        matcher = pattern.matcher(value.toString());
        if (!matcher.matches()) {

            FacesMessage msg
                    = new FacesMessage("E-mail validation failed.",
                            "Invalid E-mail format.");
            msg.setSeverity(FacesMessage.SEVERITY_ERROR);
            throw new ValidatorException(msg);

        }

    }

}
文件:User.java 的代码内容如下所示 -
/*
 * To change this license header, choose License Headers in Project Properties.
 * To change this template file, choose Tools | Templates
 * and open the template in the editor.
 */
package com.zaixian;

/**
 *
 * @author Maxsu
 */
import java.io.Serializable;
import javax.faces.bean.ManagedBean;
import javax.faces.bean.SessionScoped;

@ManagedBean(name = "user")
@SessionScoped
public class User implements Serializable {

    private static final long serialVersionUID = 1L;

    String email;

    public String getEmail() {
        return email;
    }

    public void setEmail(String email) {
        this.email = email;
    }

}
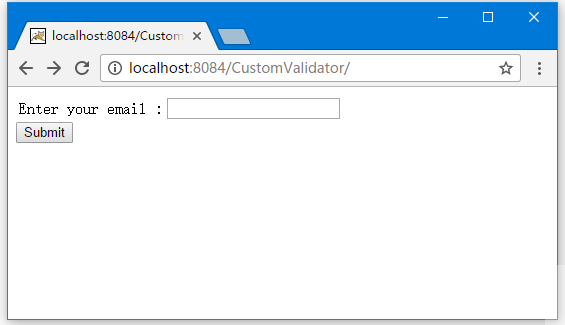
右键运行工程:CustomValidator,如果没有任何错误,打开浏览器访问:
http://localhost:8084/CustomValidator/
应该会看到以下结果 -
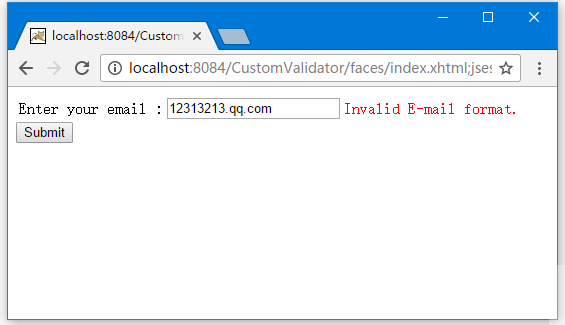
简单写入一些信息(输入一个无效的Email地址),然后提交 -
上一篇:
JSF验证正则表达式
下一篇:
JSF数据表(h:dataTable)添加删除