該控制器類從 yii\rest\ActivrController 類擴展,它實現通用的 RESTful 動作。
我們指定 $modelClass 屬性使得控制器知道使用哪個模型運算元據。
第1步 - 創建一個 UserController.php 控制器在 controllers 檔夾內。
<?php
   namespace app\controllers;
   use yii\rest\ActiveController;
   class UserController extends ActiveController {
      public $modelClass = 'app\models\MyUser';
   }
?>
接下來,需要設置 urlManager 組件,使用戶的數據可以訪問,以及使用有意義的 HTTP 動詞和漂亮網址來操縱。
為了訪問讓 API 以 JSON 數據格式返回,還應該配置應用程式組件的解析器(parsers)屬性。
第2步 - 修改 config/web.php 檔如下代碼 -
<?php
   $params = require(__DIR__ . '/params.php');
   $config = [
      'id' => 'basic',
      'basePath' => dirname(__DIR__),
      'bootstrap' => ['log'],
      'components' => [
         'request' => [
            // !!! insert a secret key in the following (if it is empty) - this is
               //required by cookie validation
            'cookieValidationKey' => 'xuhuhu.com',
         ],
         'cache' => [
            'class' => 'yii\caching\FileCache',
         ],
         'user' => [
            'identityClass' => 'app\models\User',
            'enableAutoLogin' => true,
         ],
         'errorHandler' => [
            'errorAction' => 'site/error',
         ],
         'mailer' => [
            'class' => 'yii\swiftmailer\Mailer',
            // send all mails to a file by default. You have to set
            // 'useFileTransport' to false and configure a transport
            // for the mailer to send real emails.
            'useFileTransport' => true,
         ],
         'log' => [
            'traceLevel' => YII_DEBUG ? 3 : 0,
            'targets' => [
               [
                  'class' => 'yii\log\FileTarget',
                  'levels' => ['error', 'warning'],
               ],
            ],
         ],
         'urlManager' => [
            'enablePrettyUrl' => true,
            'enableStrictParsing' => true,
            'showScriptName' => false,
            'rules' => [
               ['class' => 'yii\rest\UrlRule', 'controller' => 'user'],
            ],
         ],

		         'request' => [


		                'class' => '\yii\web\Request',


		                'enableCookieValidation' => false,


		                'parsers' => [


		                    'application/json' => 'yii\web\JsonParser',


		                ],


		                'cookieValidationKey' => 'Oxuhuhu.com2trde1xww-M97_7QvwPo-5zaixian@#720',


		         ],

'db' => require(__DIR__ . '/db.php'),
      ],
      'modules' => [
         'admin' => [
            'class' => 'app\modules\hello\Admin',
         ],
      ],
      'params' => $params,
   ];
   if (YII_ENV_DEV) {
      // configuration adjustments for 'dev' environment
      $config['bootstrap'][] = 'debug';
      $config['modules']['debug'] = [
         'class' => 'yii\debug\Module',
      ];
      $config['bootstrap'][] = 'gii';
      $config['modules']['gii'] = [
         'class' => 'yii\gii\Module',
      ];
   }
   return $config;
?>
使用一個最小實例來說明,上面剛剛建立一個RESTful API,用於訪問用戶數據。這些API包括 -
-
GET /users − 進行逐頁讀取所有用戶
-
HEAD /users − 顯示用戶列表概述資訊
-
POST /users − 創建一個新用戶
-
GET /users/20 − 返回用戶ID為 20 的詳細資訊
-
HEAD /users/20 − 顯示用戶ID為20的用戶概述資訊
-
PATCH /users/ 20 和 PUT /users/20 − 更新用戶ID為20的用戶資訊
-
DELETE /users/20 − 刪除用戶ID為20的用戶資訊
-
OPTIONS /users − 顯示端點 /users 支持的動詞
-
OPTIONS /users/20 − 顯示端點 /users/20 支持的動詞
請注意,Yii會自動複數化控制器名稱。
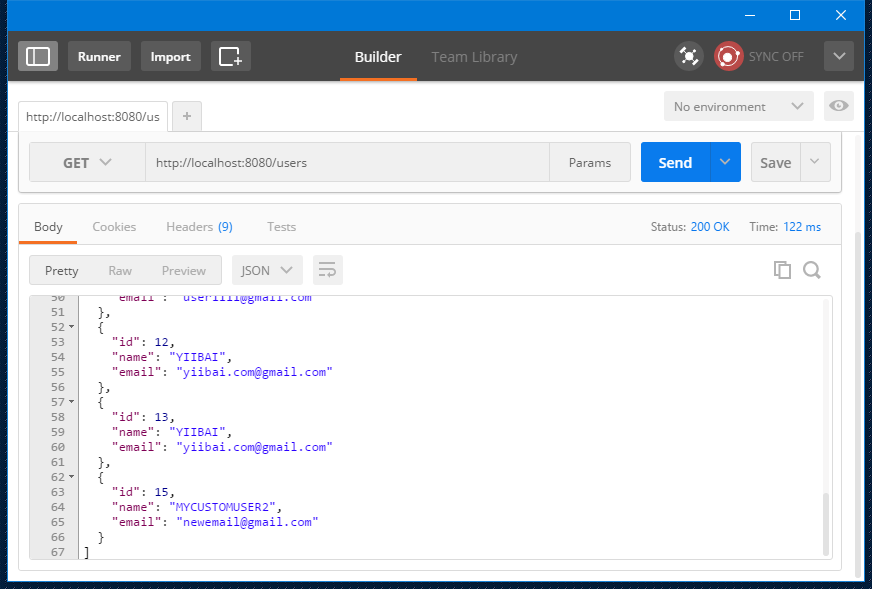
第3步 - 現在,打開Postman,切入:http://localhost:8080/users ,然後點擊“Send”。將會看到以下內容。
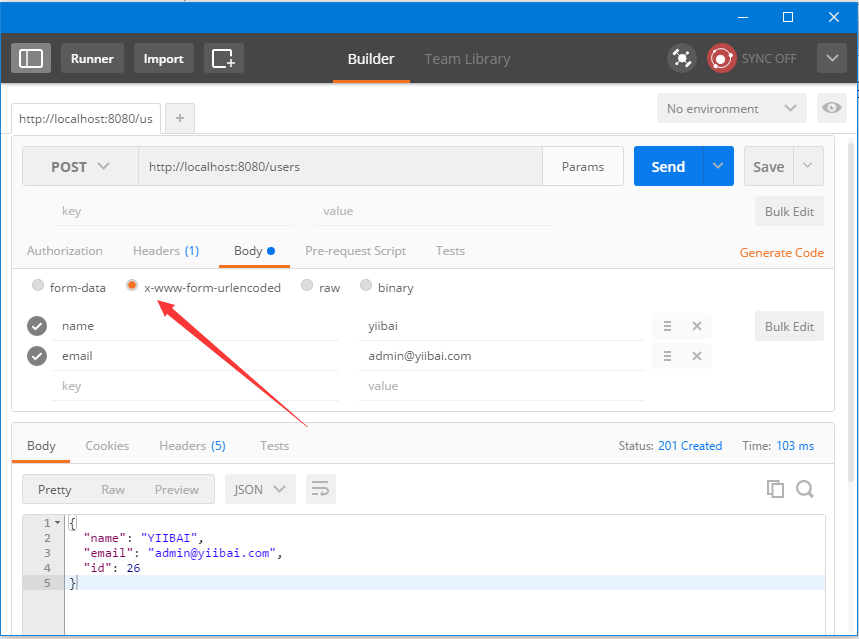
第4步 - 創建一個新用戶,修改請求類型為:POST,添加兩個主體(Body)參數:name 和 email,並點擊 “Send”。
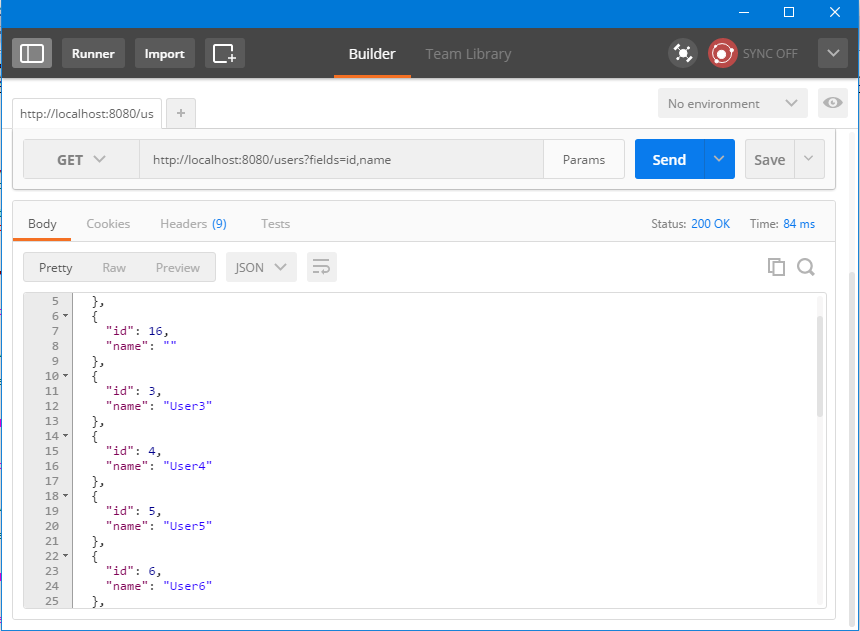
第5步 - 可以使用 fields 參數來指定哪些字段應包函在結果中。
例如,URL => http://localhost:8080/users?fields=id,name 將只返回如下面圖中顯示的 id 和 name 字段 。
上一篇:
Yii RESTful API
下一篇:
Yii字段